There are primarily many key features which make our services stand out from the rest but there are some intrinsic factors which has helped us grow and maintain high level of service quality and customer satisfaction. We are a dedicated team with years of experience in domestic and industrial level with multiple assessment and evaluating verticals for delivering the best of what is expected. Some of the key features which highlights our USPs are given below:
Quality Assurance:
Our products are made from premium materials and undergo rigorous quality control measures to ensure durability and reliability.
Expertise:
With years of experience in the industry, our team has the knowledge and expertise to recommend the best solutions for your needs.
Customization:
We understand that every project is unique, which is why we offer customizable solutions tailored to your specific requirements.
Customer Satisfaction:
Your satisfaction is our top priority, and we are committed to providing exceptional customer service every step of the way.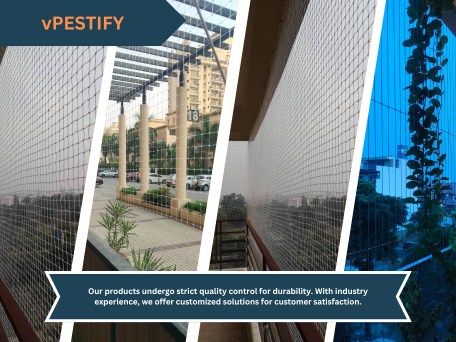
How To Install Nets
Installing balcony nets can be a crucial safety measure, especially in high-rise buildings or areas prone to high winds. Here's a step-by-step guide to the installation process:
Assessment of the Balcony
Before installation, assess the balcony structure to ensure it can support the weight and tension of the netting system. Check for any damage or weak points that may need to be reinforced.
Measurement and Planning
Measure the dimensions of the balcony to determine the size of the net required. Consider factors such as the height of the balcony, the distance between support pillars, and any obstructions like railings or protrusions.
Selecting the Net Material
Choose a suitable net material based on factors such as durability, UV resistance, and mesh size. Common materials include polyethylene, nylon, or stainless steel.
Preparing the Balcony
Clear the balcony of any furniture, plants, or debris. Ensure the surface is clean and free of any obstacles that may interfere with the installation process.
Anchor Points Installation
Install anchor points along the edges of the balcony where the net will be attached. These anchor points can be in the form of eyebolts, hooks, or brackets, securely fastened to the balcony structure
Net Installation
Begin by attaching one corner of the net to a designated anchor point using zip ties, rope, or clips, depending on the type of net and anchor points used. Gradually unroll and stretch the net across the balcony, securing it to each anchor point along the perimeter.
Tensioning the Net
Once the net is attached to all anchor points, tension it properly to ensure a snug fit without any sagging or slack. This may involve using tensioning devices or manual adjustment techniques to pull the net taut.
Securing the Bottom Edge
Secure the bottom edge of the net to the balcony railing or other support structure using additional fasteners or clips. This helps prevent the net from billowing in the wind or becoming dislodged.
Trimming Excess Material
Trim any excess net material to achieve a neat and tidy appearance. Use scissors or a utility knife to carefully cut away any surplus netting along the edges.
Final Inspection
Once the net is securely in place, conduct a thorough inspection to ensure all attachment points are secure and the netting is properly tensioned. Test the stability of the installation by applying gentle pressure to various points along the net.
Maintenance and Monitoring
Regularly inspect the balcony netting for signs of wear, damage, or loosening. Perform any necessary repairs or adjustments to maintain its effectiveness in providing safety and protection.By following these steps carefully, you can ensure the proper installation of balcony nets to enhance safety and security in residential or commercial settings.